Whether it’s a sale or another event, holidays are the perfect time to make your business stand out. Add some flair this holiday with Valentine’s Day ribbons. From ribbon rolls to custom badge ribbons, we have the perfect solution for your business to be the best it can be. Try out these ribbon suggestions today!
Promoting Product and Sales
Don’t forget about adding a little bit of color, and you can do this with badge ribbons! Add them as price tags around your store. Or have employees wear them to announce upcoming sales or giveaways. Badge ribbons are prize real estate when promoting sales, so make sure you have plenty available to use.
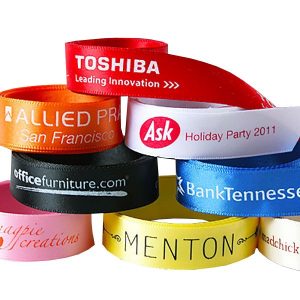
Are you having only certain products on sale or need to draw attention to one particular thing? Buy some balloons and attach them to nearly anything with custom ribbon rolls. Add your logo and company name or a Valentine’s Day sale message, and start advertising your sale now!
Start encouraging early holiday shopping with reminder “cards” in the form of custom top ribbons. These full color ribbons are the perfect way to get your message out. Add nearly any graphic, logo, image and text you want to these unique ribbons. Then, share them with customers as handouts instead of paper fliers. Give them out in shopping bags or attach them to shopping baskets so that your clientele sees them everywhere.
Sharing a Special Holiday Message
Adding icons, small graphics or a simple text message to ribbon rolls is the perfect way of sharing a holiday message. Whether it’s for client gifts or something to give customers as they make a purchase, ribbon rolls are a great way to celebrate. PRO TIP: When using organza ribbons, add a complementary color of another ribbon type for some extra depth.
Let your employees share some of your holiday spirit by having them wear badge ribbons on their name tags. Choose from several fun and festive colors and add graphics and text to wish your customers a happy Valentine’s Day. Or, give badge ribbons to customers in their bags or take out orders to spread your cheer.
Another great idea is to attach custom top ribbons to take out orders with a discount code printed on them for their next order. These full color ribbons can also include heating instructions or a simple, thoughtful holiday message.
Announcing Parties and Other Events with Valentine’s Day Ribbons
Ribbons and events are practically synonymous, so don’t forget to order ribbons to go with your Valentine’s parties and events. And, don’t be too picky about the ribbon type either. You can use every ribbon available in different ways!
Custom top ribbons are perfect for inviting guests to attend your event. Add details such as time and date, or get really creative because they are a full color option and add graphics and images. But no matter what you do with these ribbons, make sure they have your logo somewhere on them. This way, your attendees will be sure to remember where they got those fantastic ribbons.
Event decorating typically starts with custom ribbon rolls, so add those to your repertoire as well. They can literally go everywhere. From wall decorations to the front reception desk, ribbon rolls are the perfect answer to any decoration need. Cut strips as table scatter, drape them on a chair, tie bows around everything, and the list keeps going!
Other ribbons might be a bit more complicated to use but are still worth looking into. Try badge ribbons for marking seating arrangements. Or use these flat ribbons for vouchers for prizes or a way to enter a drawing. Make sure you have your thinking cap on when experimenting with badge ribbons and don’t forget to tell us (or better show us) what you did with badge ribbons for your event.


